Showing posts with label gd. Show all posts

Monday, December 28, 2009

handmade

I didn't make as many gifts this Christmas as a I did last year, but what I did make I was so excited about. I've been thinking a lot about gratitude the last few weeks. How feeling grateful actually changes your attitude which in turn changes the way you see life. So with that on my mind I decided to make gratitude journals that would help keep you thinking about gratitude all year long.


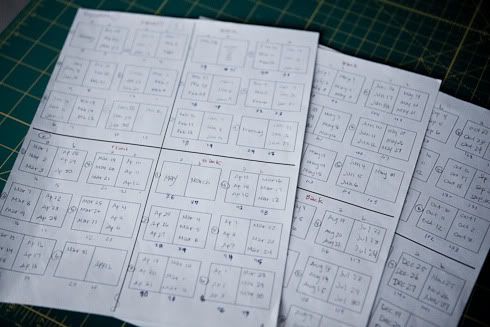
It was more of an undertaking than I thought, designing it all from scratch, but one of those projects for me that didn't seem like work at all. I created the book layout in Indesign. Here are my initial notes. I had to work out each individual signature (group of pages) before I could begin to lay it out. I told Adam there must be a program out there that does this for you, but didn't have the time or patients or money to go looking for it.


quote from book:

Gratitude unlocks the fullness of life. It turns what we have into enough, and more. It turns denial into acceptance, chaos to order, confusion to clarity. It can turn a meal into a feast, a house into a home, a stranger into a friend. Gratitude makes sense of our past, brings peace for today, and creates a vision for tomorrow. - Melody Beattie


You can't really see it so clearly in the picture, but each page has three days and a place to write 3 things your grateful for from that day. It was definitely a labor of love and hope Adam's sisters and mom will enjoy them this coming year.

And because I loved the way they turned out so much and the concept that I decided to make an extra one to sell. I know I'm cutting it close with the new year starting this week, but seeing as they were gifts I couldn't share this information until after Christmas. If your at all interested go here to see it in my etsy shop.

Have a great day!

Monday, October 05, 2009

365 photo project coming to life

Saturday night the girls and I looked through the blurb book I made of my blog from 2005. Remember this. They were getting a kick out of all the old pictures (it's crazy how much they grow in just a few years) and I reminded myself once again to keep working on the other years. I'm so close to getting 2006 published, but unfortunately still have a long way to go on the others. Trying not to let that discourage me.

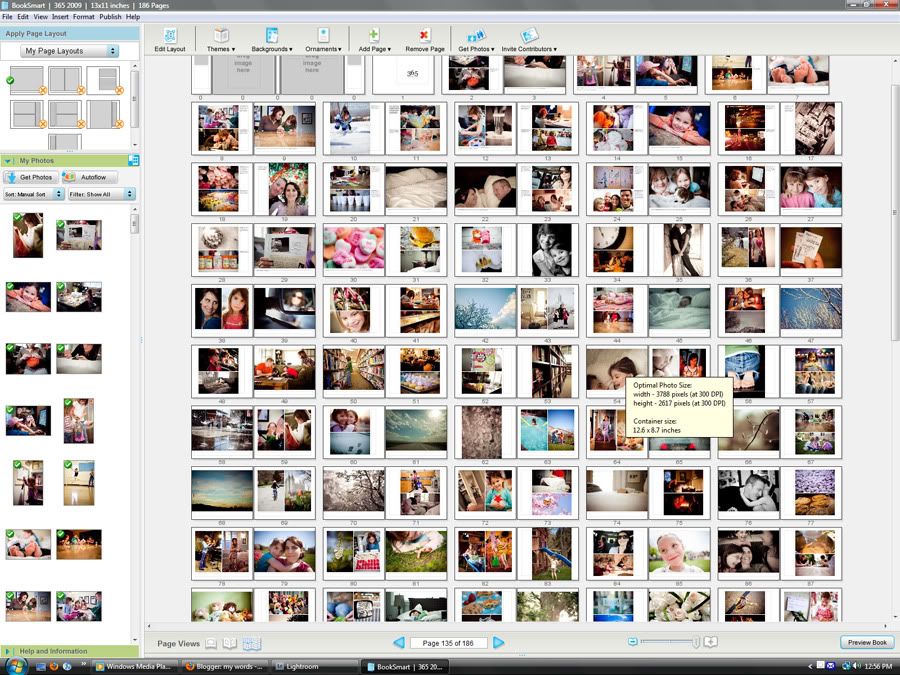
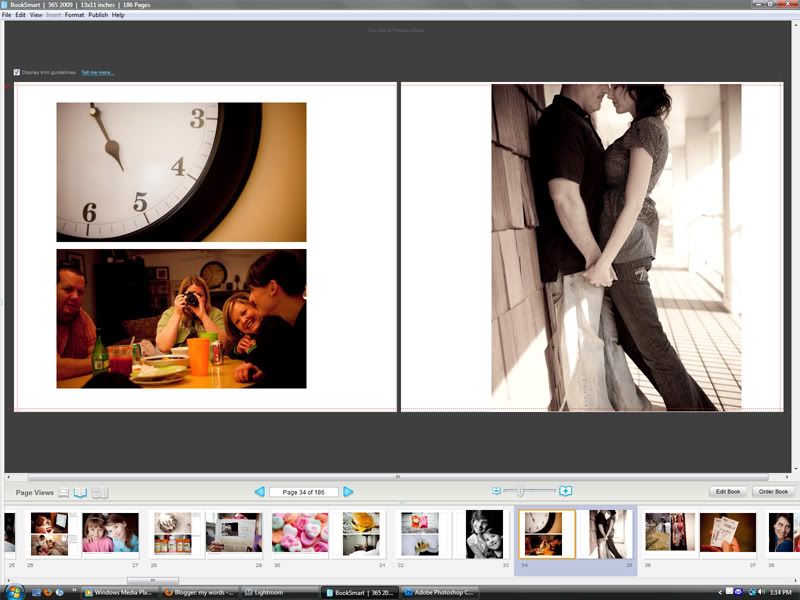
It also got me thinking about how much the girls love looking at pictures and how all my photos are just sitting on my computer (I've stopped getting them printed because they just sit in a shoebox). I've thought for a long time that I just need to put photo books together for the girls to enjoy and it got my thinking about my 365 day challenge. By taking at least one picture everyday I have a great overview of our family life this year that I can put together. It got me really excited for the possibility of this book so while everyone slept last night I started working on it.


[click here to enlarge]

Because I have the photos I want to use in a specific place already it didn't take me long at all to put it together. Just a couple of hours to design the layouts and add the photos. Now all I need to do is go back and add the date and a little synopsis about the photo, well, and wait for the year to end.

I'm really excited about this project and it definitely has my wheels turning about other things I can do. I have also seriously considered creating photo books for others as a business (not of my photos, but of theirs) and may see what I can put together in the coming year to get the ball rolling.

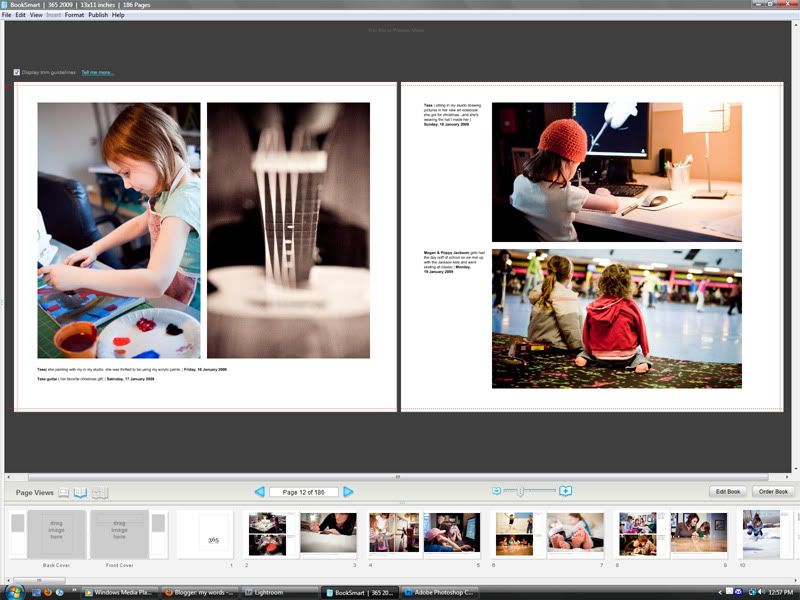
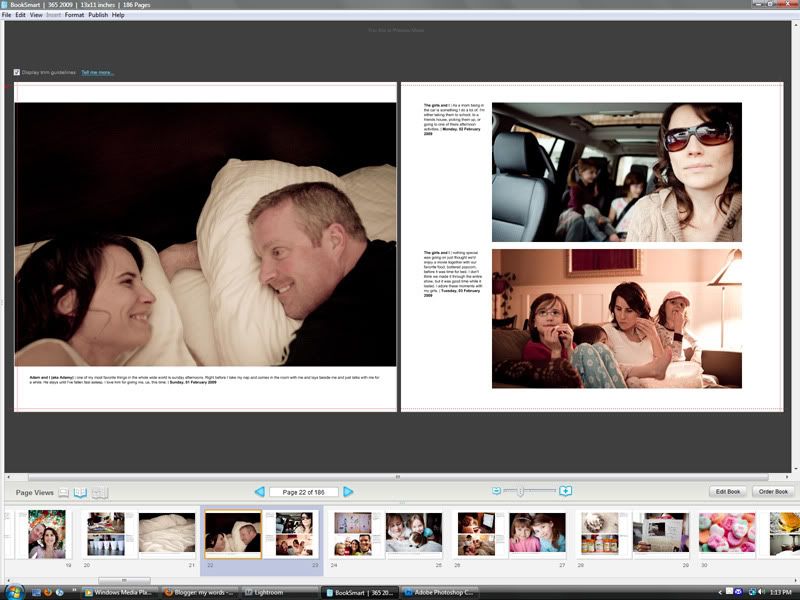
here is a few examples (i.e. screen shots of the book)


[click here to enlarge]


[click here to enlarge]


[click here to enlarge]

Thursday, September 24, 2009

this weeks headlines


one for piano
Tess finally started piano lessons Wednesday after school. I dropped the ball last year finding her a teacher in time, but this year I was fortunately enough to find a great teacher who lives close. As I sat watching her lesson I couldn't help, but think her teacher reminded me of my own grandma and then I felt even more excited that we had found her. I think it's going to be a great match.


thank goodness for backup
This has been my set up since my computer failed me last weekend. Thank goodness I had some sort of back up. I never realize how much I depend on my computer until it's gone. Besides needing certain files, not getting to create the tags I needed for Sunday, or having photoshop, the laptop has worked great. Luckily, Adam is picking up my computer this afternoon so I won't have to go another weekend without it. :)


always better to buy
I'm not sure what i was thinking except some where in the last few weeks I decided making costumes this year was the way to go. I guess after I made the apron I thought, why not do it old school. Megan picked out her costume, she wants to be Little Red Riding Hood, and I hit Joann's yesterday to pick up the pattern and fabric. $40 later. Yes, $40, I left feeling duped. I guess those nice $30 costumes online aren't such a bad deal after all (even though I have yet to spend $30 on a costume). What was I thinking? I was just having this conversation over the weekend with Robyn and Jill that you can't make clothes for cheaper than you can buy them.

a cold reminder
I heard through my screams and curses after getting a shot of cold water from Adam while enjoying my nice warm shower this morning, "nothing is worse that not feeling alive!"

and last, but not least


August & September giveaways
For one reason or another my August giveaway didn't happen so I'm making that month up. I'm giving away 10 Happy Birthday photo tags to two readers. Just like the ones seen in my esty store. If you would like a chance to win just comment and I will announce winners on Saturday eve.

have a great weekend!

Tuesday, June 02, 2009

how to: etching

This is really so simple you'll think it's silly I am doing a how to, but you asked for it so here you go.

Step 1


Mask off the area you want etched. I use cardboard stickers because they are thicker and can hold up to the cream. There are also a lot of vinyl designs you can buy if you want to add a design like a flower. Make sure to really push the letters and tape down on the edge so you get clean lines. I use a bone folder, but be careful not to push so hard you move the letters around.


This is the etch cream I use. I bought it at Michaels Art & Craft store. I think this 3oz bottle was around $7, but it's been too long I could be wrong.

Step 2


Wear gloves to protect your hands, this is really potent stuff. Liberally apply the cream in the same direction. I use a foam brush and use a downward stroke. Make sure not to leave any holes. I have found when using stickers 3 minutes is max. I went to 5 minutes once and the cream started to eat away at my letters and I didn't get a clean line. This is my experience, but you can look on the back for direction.

Step 3 (sorry no photo)
Wash the cream off with water and then begin to pull off the stickers and tape. It may look like it didn't work right away, but once it's dry you will see your design.

Here's the final result.


See, so simple. It really only takes a few minutes and there's hardly any clean up.

Thursday, February 14, 2008

i love vday


I thought the "love me" conversation heart would make a funny sp on Valentines, but perhaps just funny to Adam since we have an ongoing joke about it.

I've always enjoyed Valentines, I think mainly because it's in my favorite month, but also I always loved the act of giving valentines. When I was a kid we use to ding dong ditch our friends with love notes. I'm not sure when that tradition ended, but we don't do it anymore. Kind of sad I think. Did you use to do that as a kid? Do you still do it?

Which leads me to my next thing. Some of you asked about the valentines I made yesterday and how I did it. I took a picture and cropped it to 2x2. Then I created a 12x12 document in photoshop and copy/pasted 36 into the file. Looks like this

I printed it at costco and cut them all out. Then I printed "happy valentine's day" onto pink card stock, cut out to 3.5x2, and taped the photo onto the card. Hope that makes since. Super easy.

I finally finished a little vday book for Adam. It's not his gift, but will act as the card. It's a simple book with five pages I sewed together. Each page has a photo of us and a reason why I love him.


I forgot to take a picture of the cover, but it's just red patterned paper. Keeping it simple with my lack of time.

The picture I'm showing in the book, this picture


my now favorite picture of us, was taken by my sister-in-law while taking other family photos for my parents. When I first saw it while flipping threw photos on her camera I started to tear up. It was strange the way it brought back so many memories and how it reminded me of the way I was feeling at that moment...utterly in love and completely happy.

you might also like

Related Posts Plugin for WordPress, Blogger...